The ProxyHive browser extension turns a proxy on and off from the toolbar in Chrome and Firefox, answers the proxy's login so no password box appears, and shows the exit IP a site sees. To set it up, install it from the Apps & extensions page of your dashboard, stay signed in to the dashboard in the same browser so your proxies appear in it, press Test all, then Connect. In the browser and in the stores it is called Proxynator.
Written against version 0.3.0 of the extension on 2026-11-06. The extension page shows every screen in light and dark.
Before you start
- A ProxyHive account with at least one proxy on it. The extension lists the proxies on your account by itself, so there is nothing to copy by hand.
- Chrome 120 or later, or Firefox 140 or later.
- Turn off any other proxy or VPN extension. Only one extension can control the browser's proxy setting at a time, and this one tells you when another has taken it.
- Know your ports. Every ISP and datacenter order lists separate HTTP, HTTPS and SOCKS5 ports. In Chrome, pick the HTTP port for anything with a username and password.
Install it from your dashboard
- Sign in at https://app.proxyhive.io and open Apps & extensions from your proxy list, or go straight to https://app.proxyhive.io/proxy-managers.
- Press Install on the Chrome extension or Firefox add-on card. The store listing opens; add it there.
- Pin it to the toolbar so the popup is one click away.
- If you browse in private windows, allow it there now. The questions at the end of this guide say where.
Bring your proxies in
There are three ways in, and you can mix them. Every proxy lands in the same table, whatever its source.
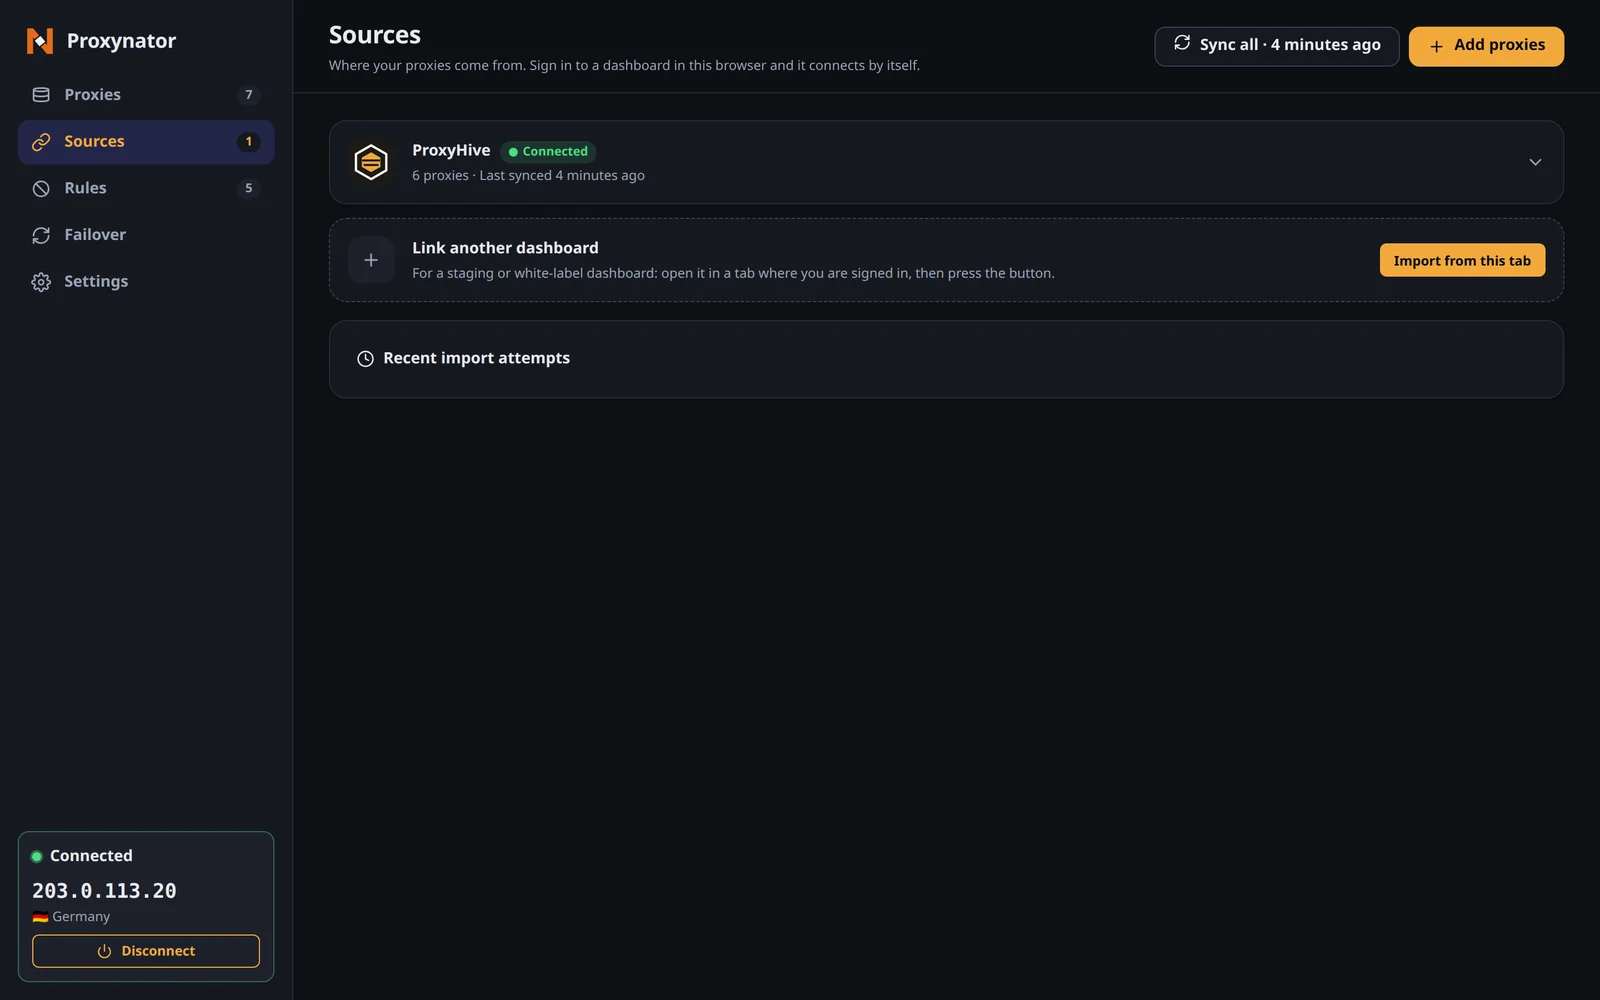
Your ProxyHive account. Open the extension's manager (the cog in the popup, or Manage at the bottom of it) and go to Sources. While you are signed in at app.proxyhive.io in the same browser, the ProxyHive row connects by itself and lists your proxies. If it stays empty, open a dashboard tab and press Import from this tab. If Sources shows an Allow access banner, accept it: the extension needs site access to read a dashboard you are signed in to. A linked account keeps its session token on this device until you unlink it.
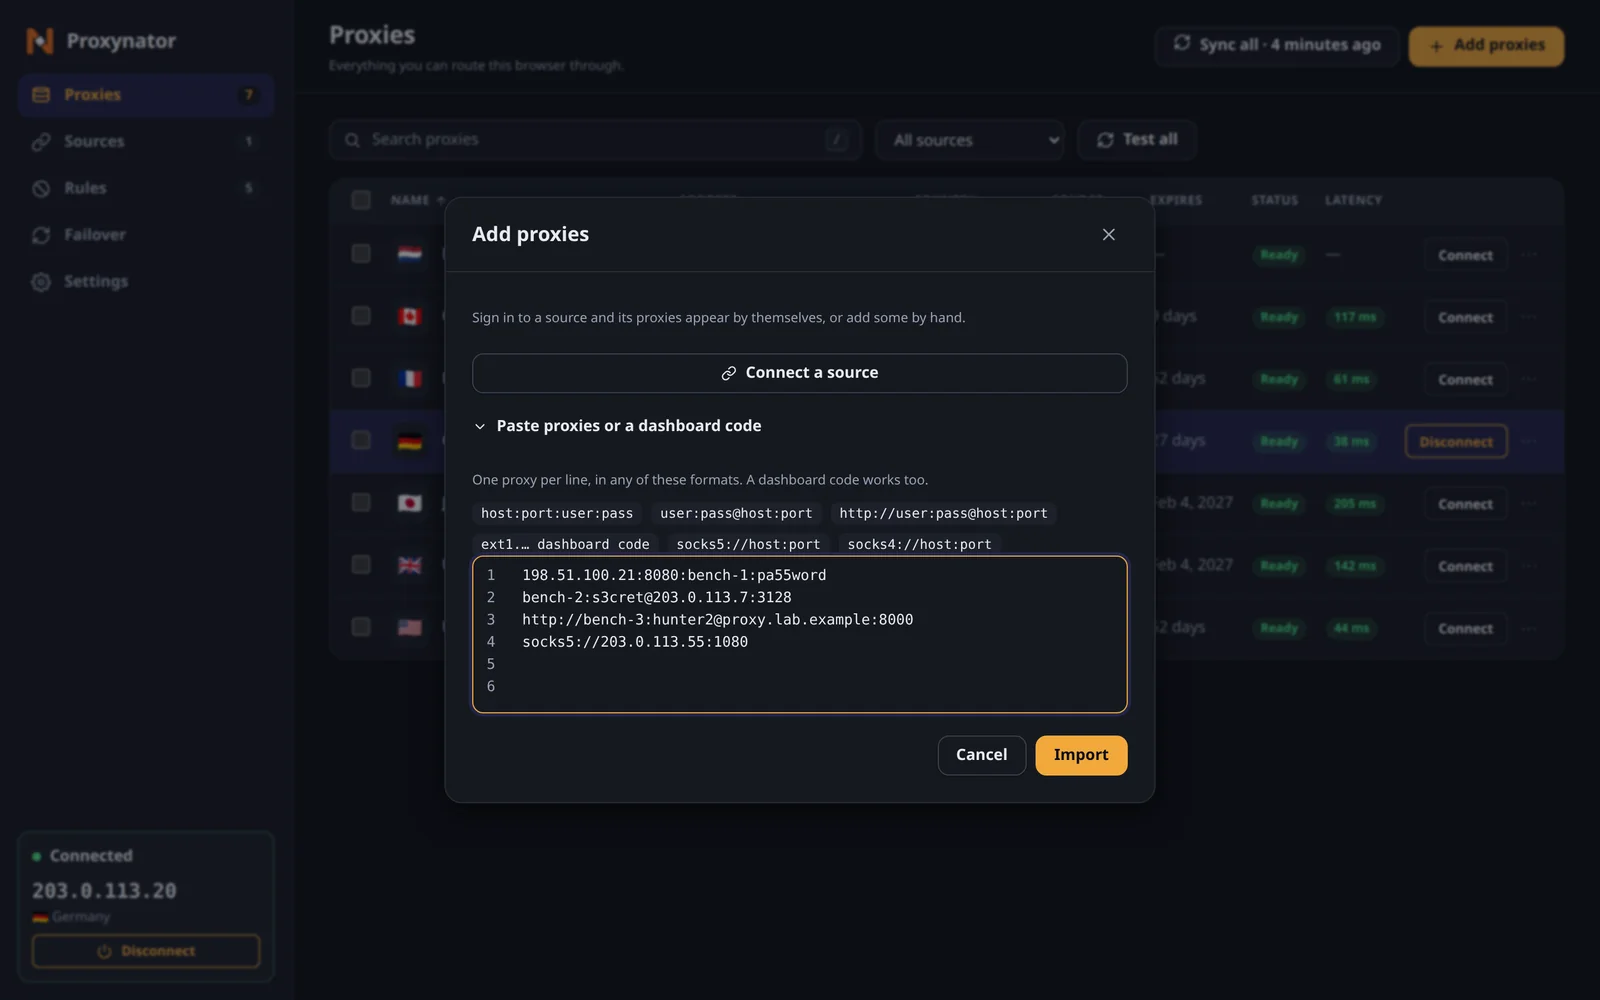
A dashboard code. Copy for extension on a proxy in your dashboard copies a code. In the extension, press Add proxies, open Paste proxies or a dashboard code, paste it and press Import.
A list. The same box takes one proxy per line as host:port:user:pass, user:pass@host:port or http://user:pass@host:port. The lines are numbered, and a line that does not parse is marked with its error, so a typo on line 37 of a long list is easy to find.
Test before you connect
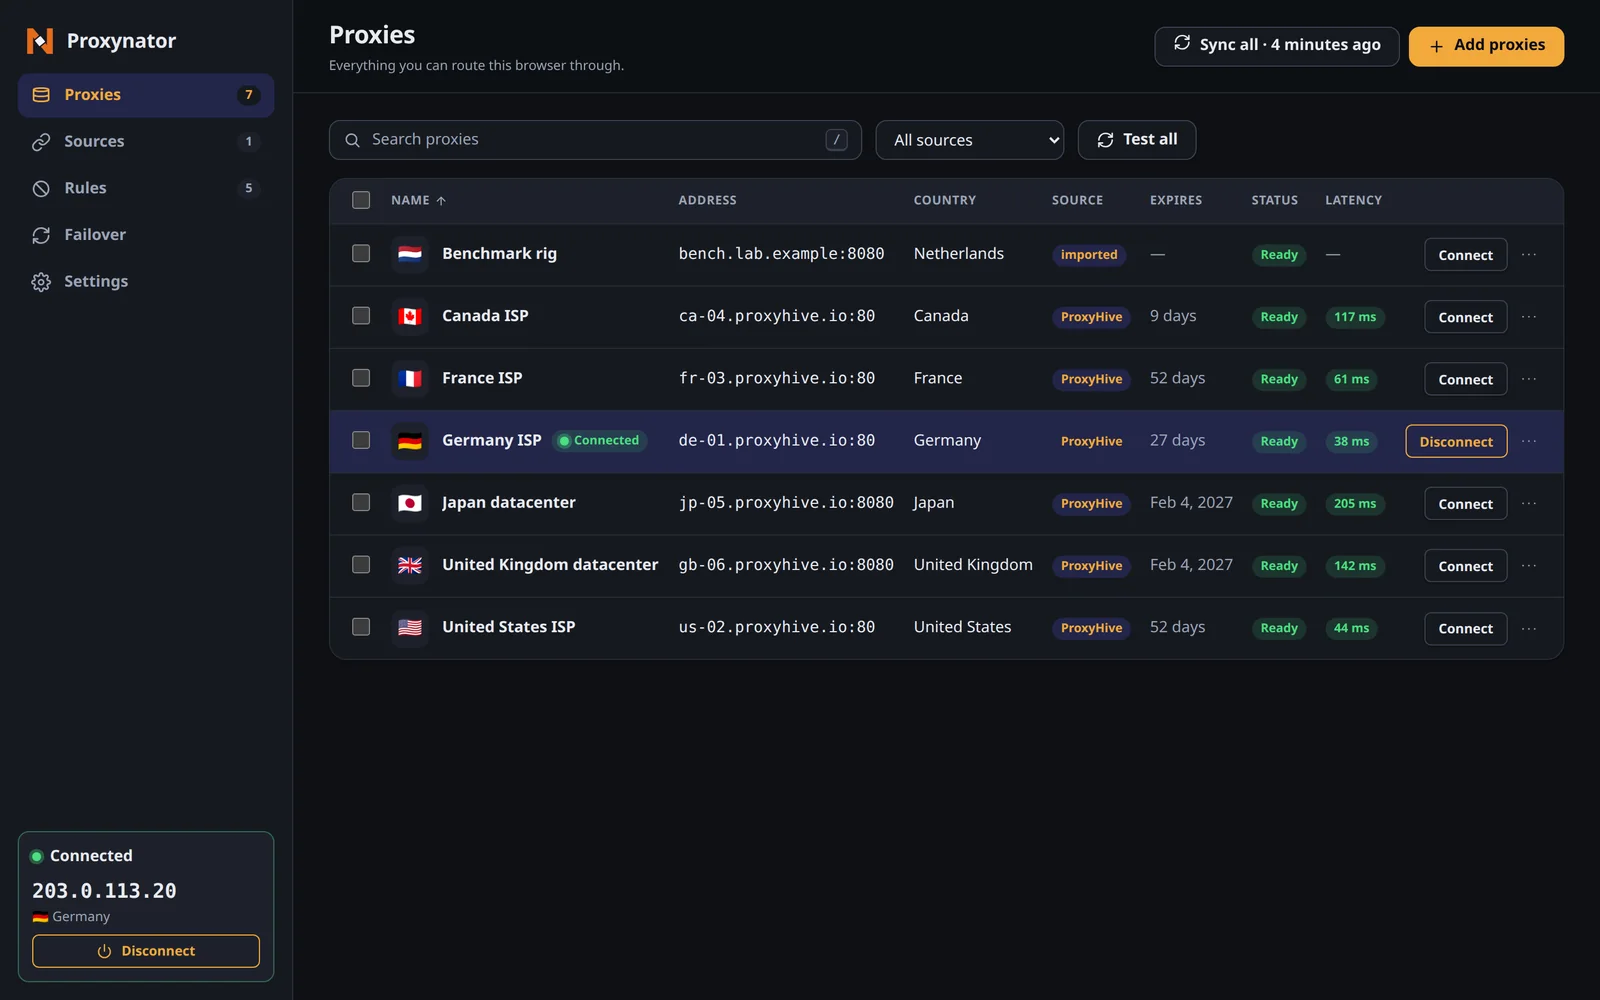
On the Proxies page, press Test all, or select a few rows and press Test with the count of rows you picked. Each test sends one request to an IP check through that proxy without moving your tabs onto it, and the round trip lands in the Latency column. A failed test names the reason instead: login refused, unreachable, timed out, wrong scheme or TLS.
A result counts as stale after 30 minutes, or as soon as you change the proxy's address or username, and is marked that way. Chrome runs tests one at a time and Firefox up to four at once, so Test all on a long list is quicker in Firefox. What the Test button measures goes through what that number is and what it is not.
Connect and read the exit IP
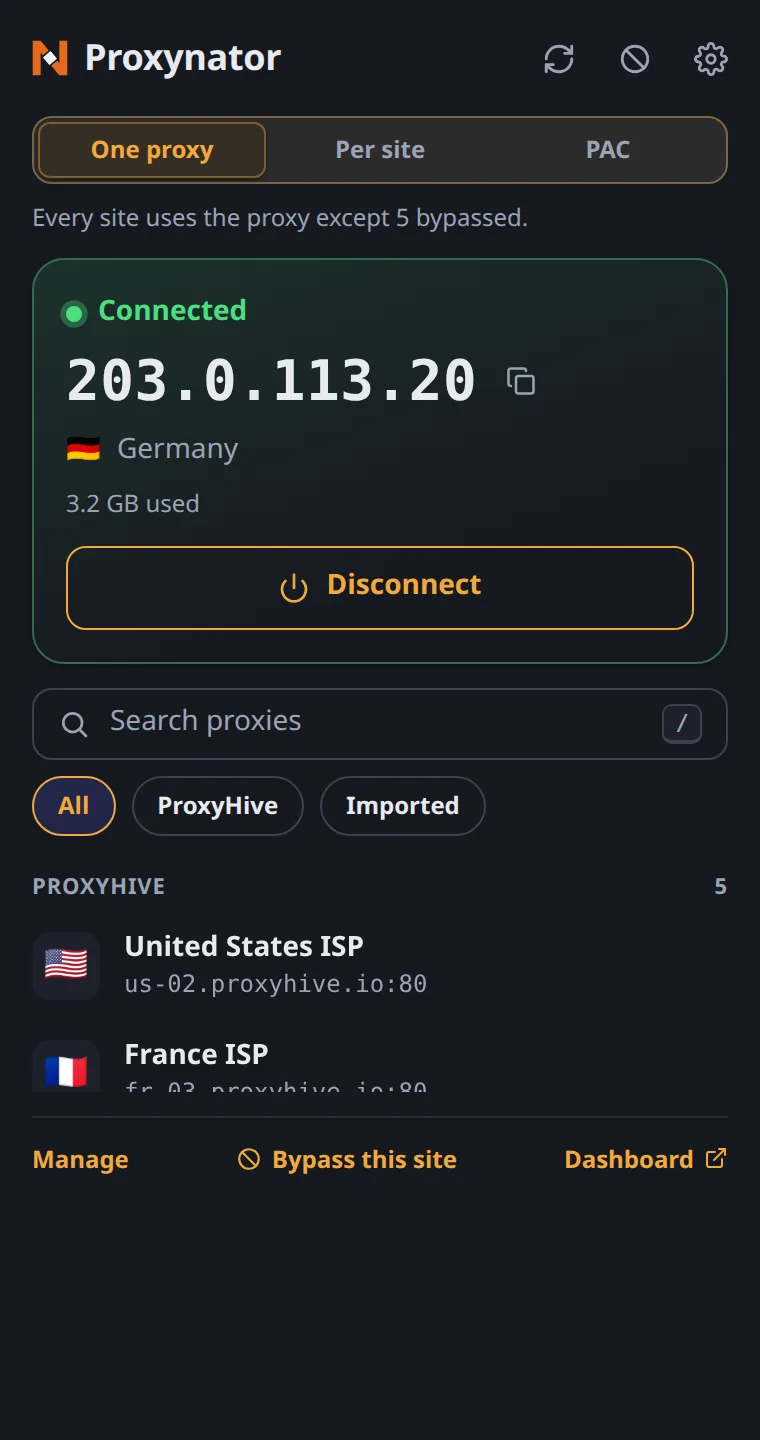
- Click the toolbar icon. With One proxy selected, every site goes through the proxy you connect, apart from those on the bypass list.
- Press Connect on a row. Press
/to jump to the search box; Enter connects the first match. - The card turns to Connected and shows the exit IP in large type with a copy button, and its country. That is the address a site sees.
If the proxy refuses the login, cannot be reached, or another extension holds the proxy setting, the card says so in place of an address. Disconnect puts the browser back on your own connection, and when you are off, Reconnect picks up the last proxy you used.
The exit IP comes from one request. To see whether a page can still find a second address through WebRTC, or whether any header names a proxy, run the proxy checker while connected.
Bypass a site, or route by site
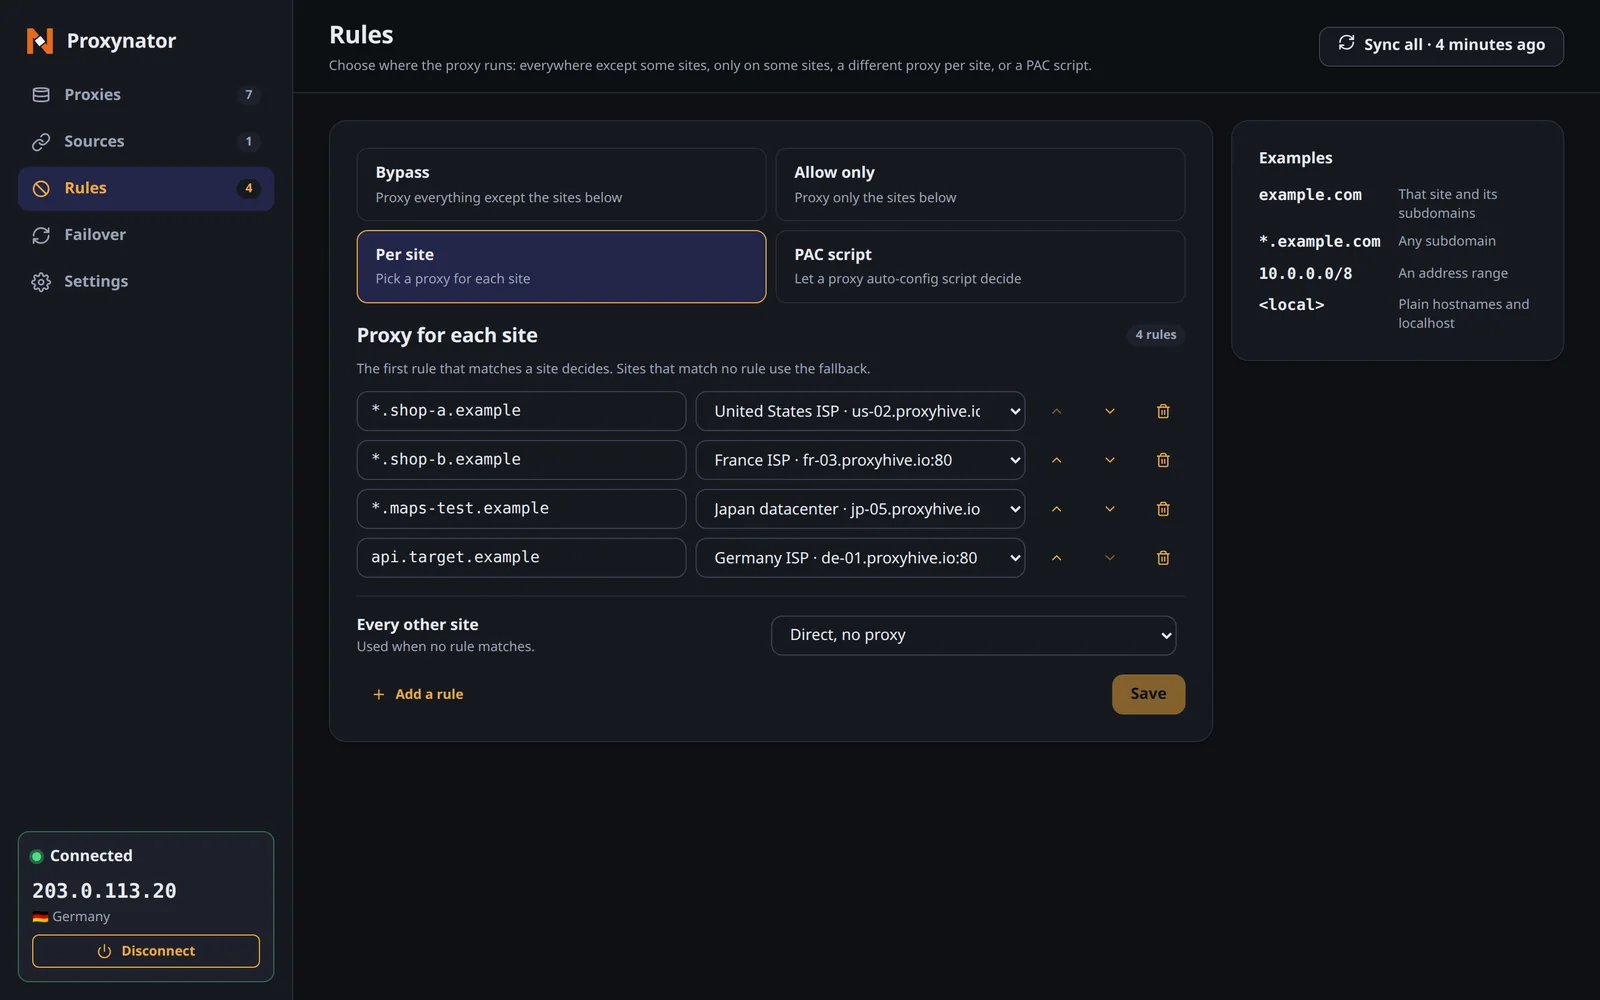
Bypass this site at the bottom of the popup sends the site in the current tab straight out on your own connection. The full list lives on the Rules page, which has four modes:
| Mode | What it does |
|---|---|
| Bypass | Proxy everything except the sites listed |
| Allow only | Proxy only the sites listed |
| Per site | Pick a proxy for each site, and a fallback for the rest |
| PAC script | Let a proxy auto-config script decide |
For Per site, add a rule per site and choose the proxy it goes through. The first rule that matches a site decides, so put narrow rules above broad ones. Every other site sets the fallback: direct, or a proxy. Press Save, then choose Per site in the popup. A rule pointing at a proxy that stops answering makes its sites fail rather than load from your own address.
How a pattern matches, from the matcher's own code:
shop.examplematches that host only, notwww.shop.example.*.shop.examplematches every subdomain, but notshop.exampleitself. Add both lines to cover both.10.0.0.0/8matches an IPv4 range, and<local>matches plain host names such asintranet.
Two proxies that share one address but use different logins cannot both appear in the rules, because the browser answers an address with one login only; the page blocks Save and names the pair. Rule-based routing explains the idea in general, and comparing two proxies side by side puts per-site rules to work.
Failover and the other switches
Failover is off until you switch it on. Then, when the connected proxy stops answering or refuses the login, the extension moves to the next proxy that passes a test, in the order you set on that page, and leaves a notice saying so. Switch-on-block does the same when the main page of a site you list answers 403 or 429, at a capped rate so a stubborn site cannot burn through your list. A captcha page that answers 200 looks like success to it.
Settings holds the theme (system, light or dark), the language (English or Simplified Chinese, following the browser by default), WebRTC leak protection (off by default; the browser asks for the permission when you turn it on), and the anonymous usage statistics switch, also off by default. The extension suggests Alt+Shift+P as a shortcut to connect and disconnect; your browser's extension shortcuts page can change it.
Troubleshooting
- The card says another extension controls the proxy. Disable the other proxy or VPN extension, then connect again.
- Login refused. Check the username and password on the order. In Firefox, restart the browser after you correct them.
- Chrome refuses a SOCKS5 proxy. Chrome cannot send a SOCKS5 login. Use the HTTP port.
- Tests say they are paused. Tests do not run while a PAC script routes the browser. Switch to One proxy or Per site first.
- The proxy tests fine but a site blocks you. The test proved the proxy works, not that the site accepts it. The guide to avoiding blocks and the proxy error codes cover what comes next.
- You need the proxy outside the browser. The extension routes this browser only. ProxyDesk gives every app on the machine one local address.
Prefer to set a proxy without an extension, or with another switcher? The Chrome and Firefox guides cover the built-in settings, and SwitchyOmega and FoxyProxy have their own guides.